


Stainless steel decorative strips have become the go-to detail for hotels, villas and high-end retail interiors — a slim metal line is all it takes to upgrade a plain gypsum ceiling, frame a feature wall, or finish a tile edge with a crisp shadow gap. But the difference between a magazine-worthy result and a peeling, cracked, rusty disappointment almost always comes down to how the strip is installed.
This guide walks you through the methods our team at ARTDSN uses every week on commercial sites across China and South-East Asia. We create a popular “stainless steel line installation” tutorial and extend it with the cross-section checks, mistake callouts and material-grade tables our fabricators use internally.

Most site teams already own these. The two items people forget are the laser line level (cheap spirit levels drift on long runs) and the rubber mallet (a steel hammer will dent a mirror-finish strip on the first hit).
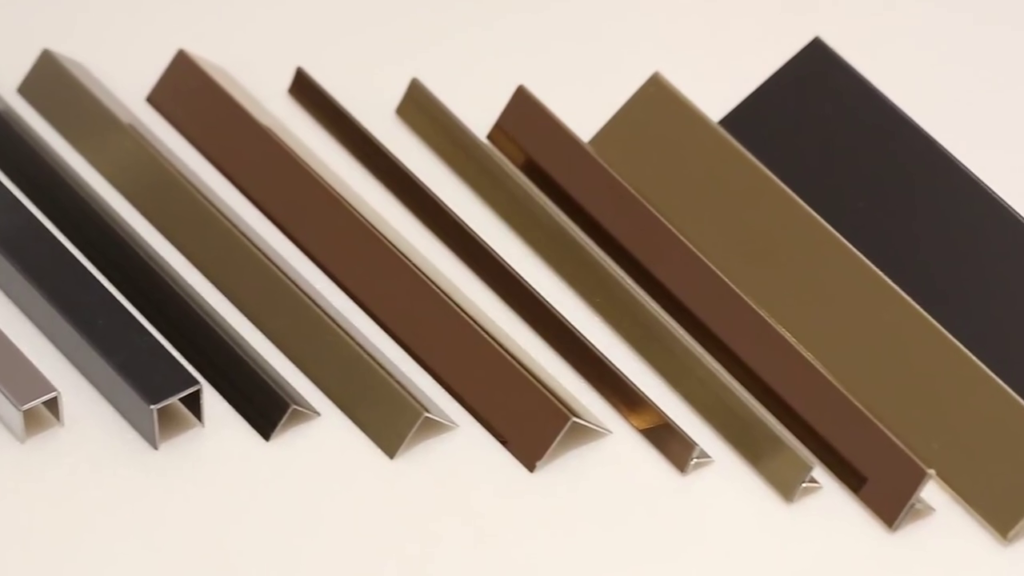
| Profile | Typical Size (mm) | Best For | Finish We Use Most |
|---|---|---|---|
| U-channel | 10 × 10, 15 × 15, 20 × 20 | Tile edge protection, glass partition frame, LED strip housing | Brushed stainless 304 |
| Flat bar | 20 × 3, 30 × 3, 40 × 5 | Mid-wall picture rail, ceiling inlay line, skirting cap | Hairline / mirror / champagne gold PVD |
| T-bar | 15 × 10, 25 × 15, 40 × 20 | Ceiling grid, partition seam cover, expansion joint cover | Brushed / black PVD |
If you’re unsure, ask the factory for a 200 mm cross-section drawing before you cut — every millimetre of depth affects whether the strip reads as a hairline detail or a chunky border.
The Chinese reference tutorial groups all stainless-steel line work into three scenes: surface mounting, recessed embedding and corner wrapping. In our project files we split that into five methods so the QA team can sign each one off separately.
| # | Method | Substrate | Fixing | Joint Treatment | When To Use |
|---|---|---|---|---|---|
| M1 | Surface-mount with adhesive | Painted drywall, tile, glass | MS polymer + double-sided tape | Silicone butt joint, 1–2 mm gap | Retrofit / renovation where chasing is not allowed |
| M2 | Recessed into plaster | New gypsum board ceiling / wall | Embedded before skim coat | Flush with plaster, then sanded | Hairline shadow-gap look (the “minimalism” favourite) |
| M3 | Mechanical clip + adhesive | Ceiling grid, partition frame | Stainless clip + silicone | Clip covers joint, no visible line | Long runs above 3 m where thermal movement matters |
| M4 | Corner wrap (L-shape) | Outside corners of columns, door frames | Adhesive + pin tack | 45° mitre, hairline closed | Edge protection, hotel-room door frames |
| M5 | Back-lit LED slot | Ceiling perimeter, behind mirror | Recessed channel + LED strip | Translucent silicone end caps | Ambient cove lighting, lobby feature walls |
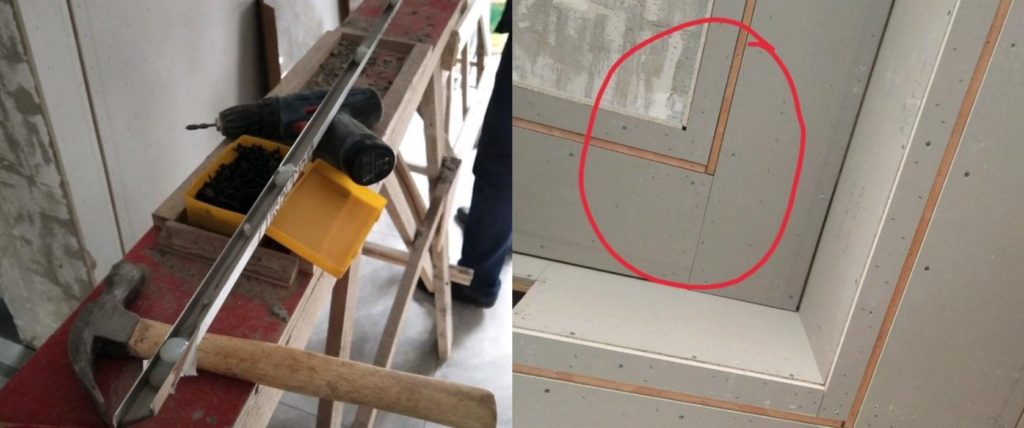
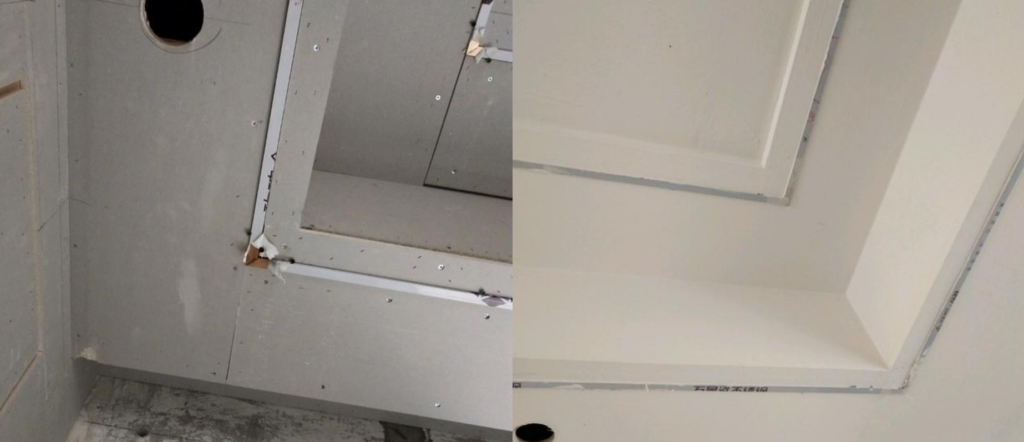
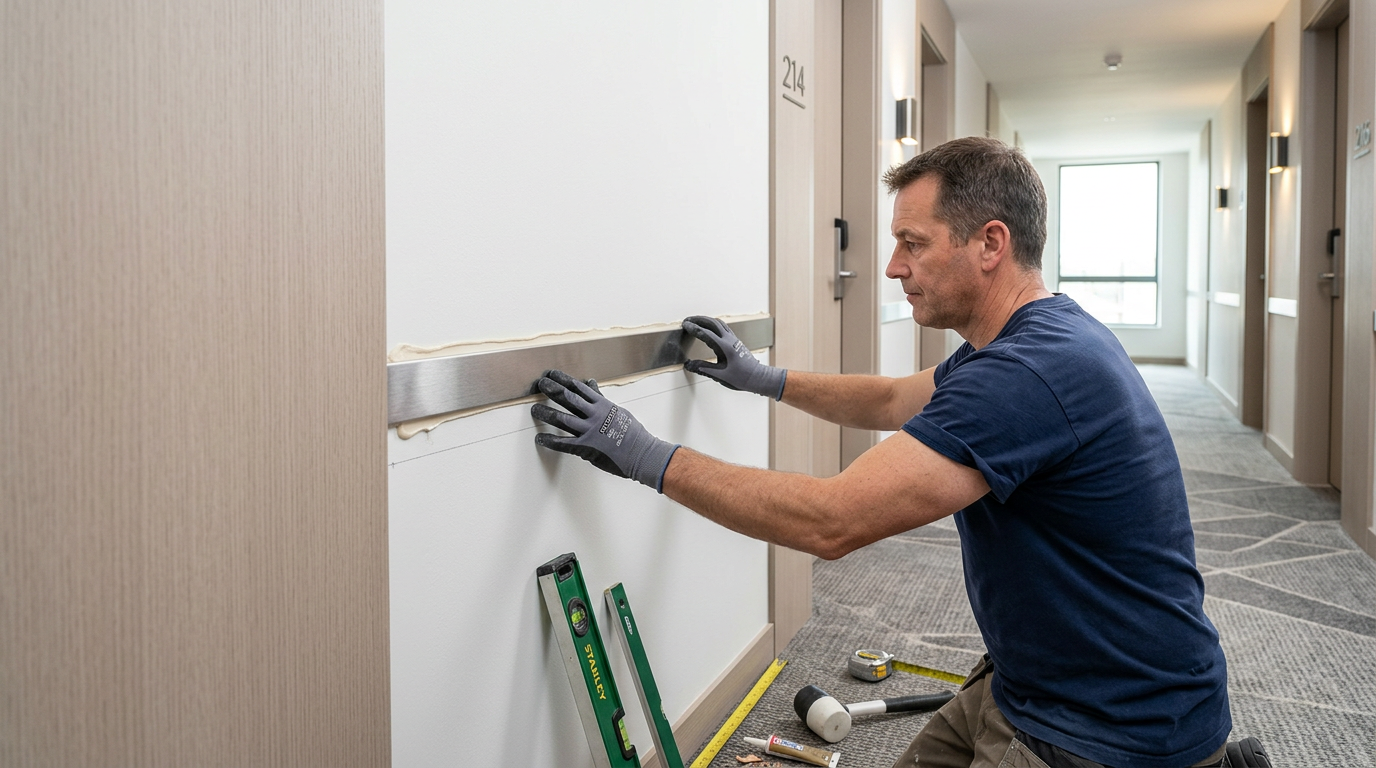
For mid-wall lines on drywall, the workflow is the same as the ceiling, but you must prime the wall first. Bare gypsum absorbs adhesive oils and the bond line fails within months. One coat of water-based primer, full dry, then start the M1 sequence above.
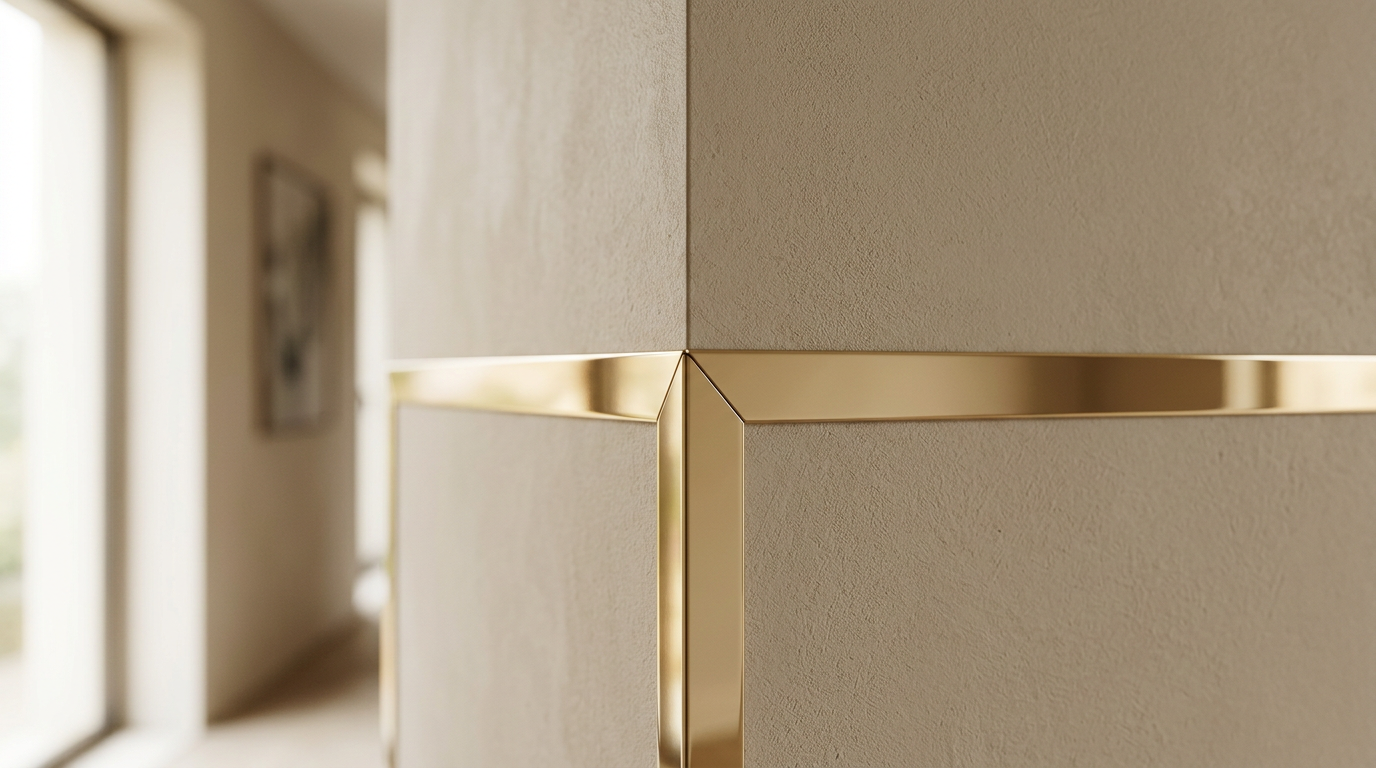
The outside-corner detail is what separates a site from a show flat. Three rules:
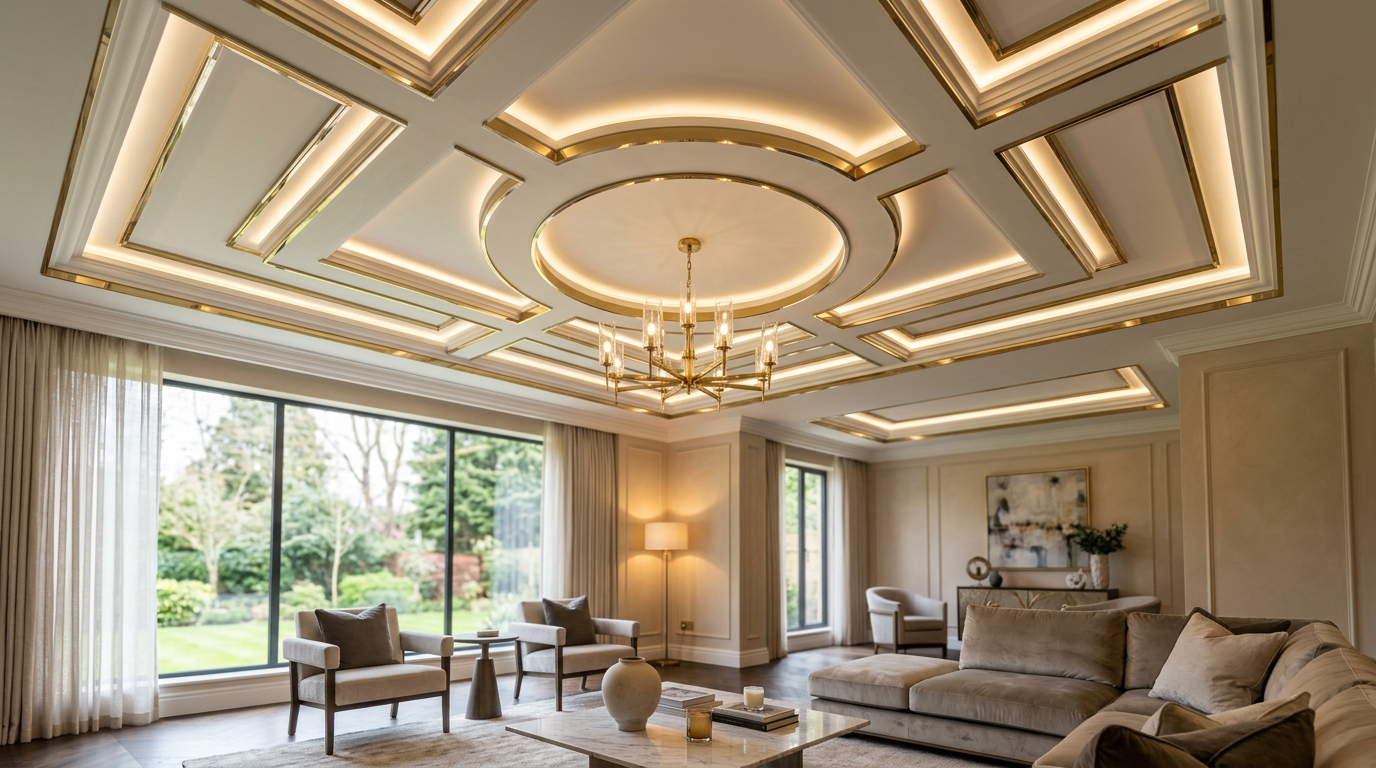
On our 2026 hotel and villa projects, the most requested pattern is a geometric ceiling frame built from champagne-gold PVD T-bars with concealed warm-white LED inside the channel. The 25 × 15 mm profile reads as a crisp 25 mm-wide gold line by day and disappears into a soft halo by night.
Specifying the right stainless grade is half the install. A 201 strip will rust inside 12 months in a hotel bathroom; a 316 strip will outlast the building.
| Grade | Cr / Ni Content | Recommended Environment | Estimated Lifespan (interior) |
|---|---|---|---|
| 201 | 16 % Cr / 3.5 % Ni | Dry interior, low-traffic ceilings | 5–8 years, may show tea-staining |
| 304 | 18 % Cr / 8 % Ni | Living rooms, hotel rooms, corridors | 15+ years, default ARTDSN spec |
| 316 | 16 % Cr / 10 % Ni / 2 % Mo | Bathrooms, kitchens, coastal / pool areas | 25+ years, chloride resistant |
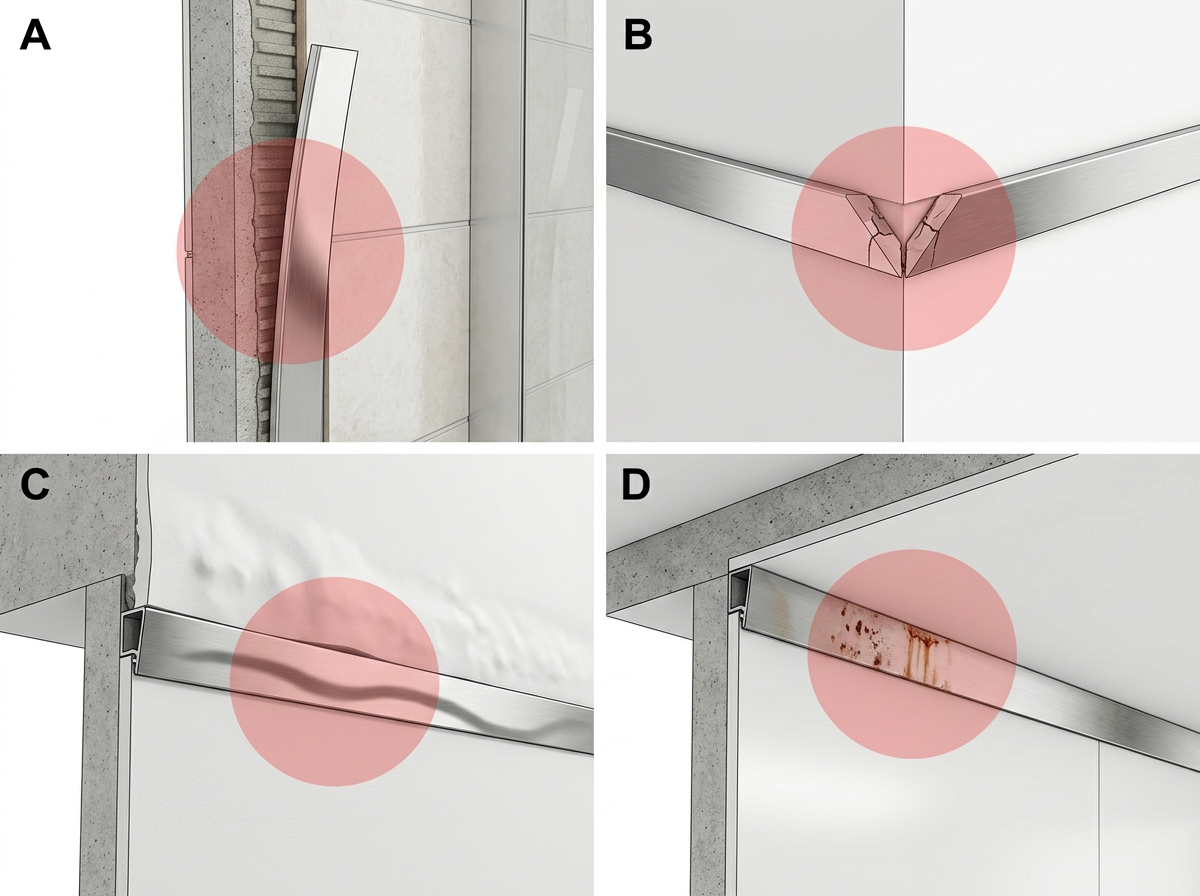
| ID | Failure | Root Cause | Fix |
|---|---|---|---|
| A | Strip peels off after 2–3 months | No adhesive, only double-sided tape, or dusty substrate | Remove, clean with isopropyl, re-fix with MS polymer + 24 h cure |
| B | Mitre corner cracks | Rigid joint, no expansion gap on long runs | Re-cut, leave 1 mm gap, fill with colour-matched silicone |
| C | Wavy shadow line along the strip | Drywall substrate not flat (> 2 mm over 1 m) | Skim-coat and re-sand to ≤ 1 mm deviation before installing |
| D | Rust spots on bathroom ceiling strip | Wrong grade (201 / 304 in a humid zone) | Replace with 316, add anti-rust primer behind the strip |
Can I install stainless strips on a tile wall?
Yes — use method M1 with MS polymer, no drilling. Mask the tile edges so adhesive squeeze-out does not stain the grout.
What’s the longest single run I can do without an expansion gap?
About 3 metres for a 304/316 strip in an air-conditioned interior. Longer than that, leave a 1 mm gap every 3 m and fill with neutral-cure silicone.
Do you supply custom lengths?
ARTDSN ships standard 2.7 m lengths from Foshan stock and can cut to any length up to 6 m on a 7-day lead time for orders above 500 m. Custom cross-sections start at 200 kg per profile.