
In any tiled interior — from a residential bathroom to a commercial lobby — there is one component that appears at every corner, every edge, and every transition, yet almost never receives the design attention it deserves: the L-shaped tile trim profile. At ARTDSN, we manufacture these profiles as precision-engineered architectural components, not merely decorative extras. This article examines what actually determines whether an L-shaped trim performs reliably across a 20-year operational life — and why the profiles used in modern interior architecture are far more technically demanding than their simple geometry suggests.
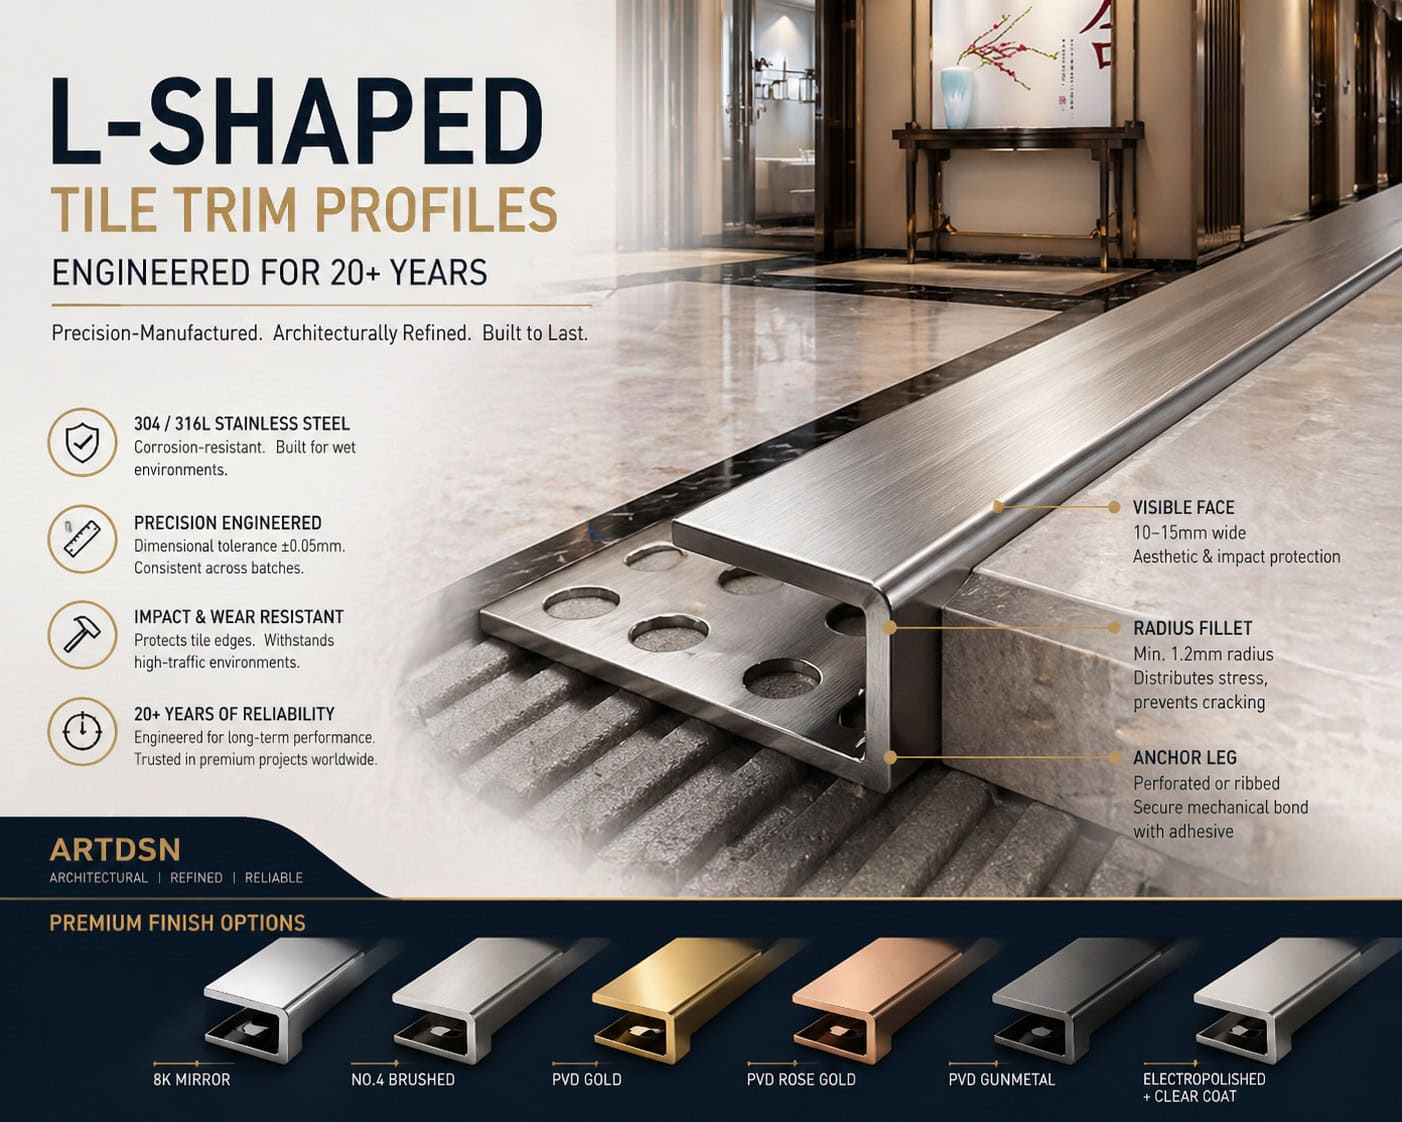
An L-shaped tile trim is not one profile — it is a system of three functional zones, each of which must be designed and manufactured to specific tolerances:
The Anchor Leg (the concealed section) The vertical leg that embeds into the tile adhesive layer. This section features a perforated or ribbed geometry that key-locks into the mortar. If the perforation pattern is too coarse, adhesive cannot develop sufficient bond strength and the trim will delaminate. If the perforations are too fine or too sparse, the trim will not be held rigidly in place during grouting — causing alignment drift. ARTDSN specifies a minimum of 6 anchor ribs per 100mm of length, with rib depth of ≥1.2mm to prevent pull-out failure under lateral tile movement.
The Radius Fillet (the transition zone) The internal corner where the anchor leg meets the visible face — this is where most inferior trim profiles fail. A sharp internal corner creates a stress concentration that cracks under thermal cycling. The radius of this fillet determines how effectively impact loads are distributed. Profiles with an internal radius below 0.8mm will show fatigue cracks within 3–5 years in high-traffic environments. ARTDSN L-shaped profiles are produced with a minimum 1.2mm internal radius fillet as standard.
The Visible Face (the aesthetic surface) The horizontal leg that forms the finished edge of the tile installation. The width of this face typically ranges from 8mm to 15mm. Narrower faces (<8mm) are purely aesthetic; they provide insufficient impact resistance for floor installations. For floor-level tile trims, ARTDSN recommends a minimum visible face width of 10mm. The face must also be produced to a flatness tolerance — a twisted or bowed visible face in an installed trim is immediately apparent under raking light and cannot be corrected post-installation.
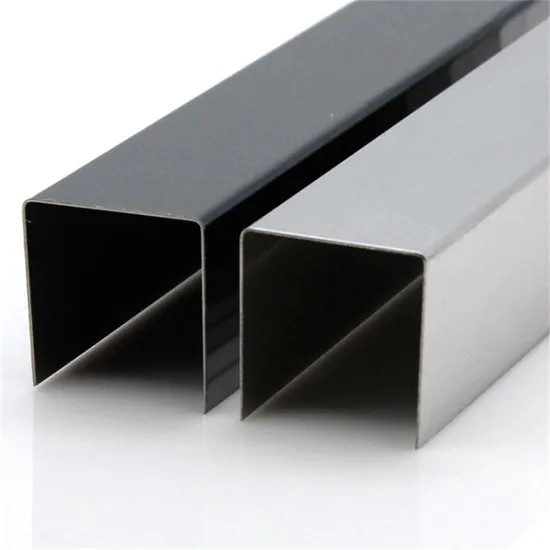
Unlike straight transition strips or T-profiles, L-shaped profiles undergo two forming operations — the initial extrusion or cold-roll forming of the open section, followed by a secondary draw-bend to create the precise 90° angle. This secondary bending is where production quality diverges significantly between manufacturers:
Spring-back compensation: Stainless steel has significant elastic recovery. When a bending brake releases the piece, the material springs back by 1–3° depending on thickness and grade. If the tooling is not calibrated for spring-back, the final installed angle will be 88° or 92° rather than 90° — creating an immediately visible misalignment at the corner.
Surface distortion at the bend: The outer surface of the bend is stretched while the inner surface is compressed. In lower-quality production, this causes visible surface ripple (often called “oil canning”) at the corner. While a slight surface ripple is acceptable in non-reflective finishes, it is completely unacceptable in No.4 brushed or 8K mirror finishes. ARTDSN uses precision-calibrated draw-bend tooling with radius guides that maintain surface integrity through the deformation zone.
Dimensional consistency across production runs: An L-shaped trim manufactured in January for a project’s initial phase must visually match trim from a production run in August for a later phase. This requires tight control of incoming material gauge (thickness tolerance of ±0.05mm for 1.5mm thick material) and tooling wear management (punches and dies are measured and replaced at defined cycle counts).
The most common mistake in specifying L-shaped tile trims is selecting aluminum for wet-area or high-humidity environments. The rationale is typically cost — aluminum is cheaper than stainless steel. However:
ARTDSN specifies 304 (EN 1.4301 / ASTM A240) as the minimum grade for interior L-shaped tile trims. For wet-area applications (bathrooms, spas, pool decks), 316L (EN 1.4404 / ASTM A240) with electropolished finish is the standard recommendation — the molybdenum content provides meaningful resistance to chloride-induced pitting.
Not all L-shaped tile trims are the same cross-section. The specific geometry must be matched to the installation context:
Standard Floor Tile L-Shaped Trim
Thin-Board Porcelain L-Shaped Trim (6mm tiles)
Back-splash and Wall-Only L-Shaped Trim
Carpet-to-Tile Transition L-Shaped Trim
Swimming Pool and Wet-Area L-Shaped Trim
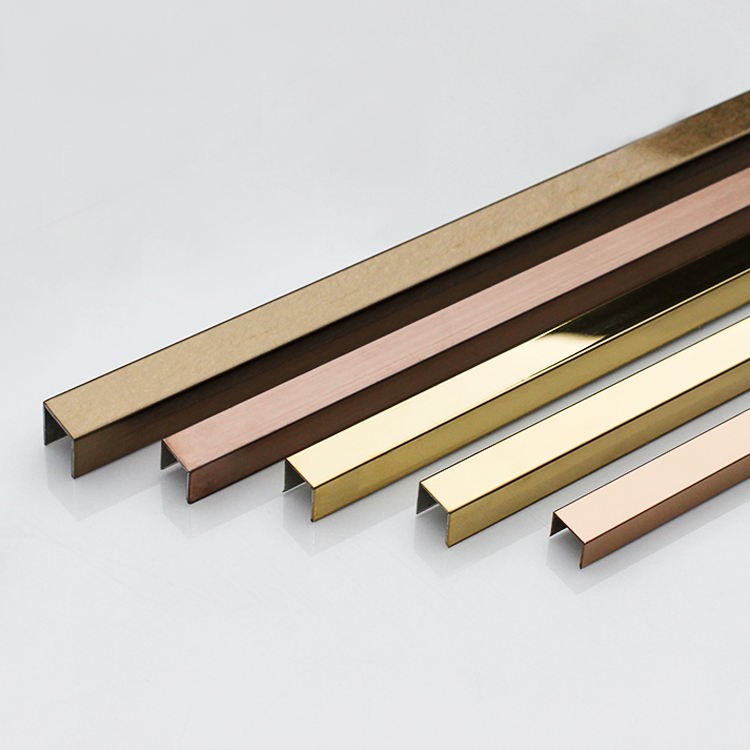
The visible face of an L-shaped tile trim is available in multiple surface finishes, each with distinct optical properties and maintenance implications:
| Finish | Reflectivity | Scratch Visibility | Maintenance | Application |
|---|---|---|---|---|
| 8K Mirror | High | High (shows everything) | Requires gentle cleaning | Feature walls, decorative niches |
| No.4 Brushed | Low-Medium | Low (scratches blend in) | Neutral cleaner, non-abrasive | All floor and wall tile installations |
| No.8 Mirror (super mirror) | Very High | Extremely visible | Professional cleaning only | Low-traffic decorative installations |
| PVD Gold | Medium, warm-toned | Low | Non-abrasive cloth only | Boutique hospitality, residential feature areas |
| PVD Gunmetal | Low, matte-metallic | Low | Wipe clean | Contemporary / industrial interiors |
| Electropolished + Clear Coat | Medium-High | Very Low | Chemical-resistant | Swimming pools, coastal, food-service |
Color Consistency Across Batches: All ARTDSN PVD finishes are measured against the CIE Lab color space with a ΔE ≤ 1.5 tolerance between production batches. For multi-phase hotel projects or large commercial interiors requiring delivery across 18+ months, this ensures the trim installed in Phase 3 visually matches Phase 1.
Even the highest-quality L-shaped tile trim can fail if the specification or installation is incorrect. The most common field issues ARTDSN observes, and the specifications that prevent them:
Issue 1: Trims installed flush with tile face rather than 1–2mm below grout line This causes grout to sit proud of the trim, creating a moisture-trapping seam that discolors over time. Specify: “Trim shall be installed such that the visible face sits 1–1.5mm below the plane of the tile face, allowing grout to be struck concave and sealed against the trim with a flexible silicone.”
Issue 2: Adhesive applied only to the center of the anchor leg If the adhesive does not fully coat the perforated anchor leg, the trim will not be restrained during grouting and may shift. Specify: “Full adhesive coverage of anchor leg required. Contractor to verify bond before grouting.”
Issue 3: Mismatch between trim height and tile thickness Porcelain tiles at 6mm and natural stone tiles at 12mm require different trim heights. Always specify trim height as a separate line item to tile selection, not assumed. ARTDSN produces trims in 6mm, 8mm, 10mm, 12mm, 14mm — for stone installations up to 20mm.
Issue 4: Specifying trim without finish sample approval PVD color finishes vary between production batches if not properly calibrated. Always require a physical finish sample (100mm length minimum) for approval before bulk production. ARTDSN provides sample pieces at no charge for specification verification.
L-shaped trim is the most common profile, but it is only one element in a complete tile trim system. A typical premium interior installation requires:
ARTDSN manufactures all of these profile types in matched finishes, ensuring that the complete trim package across a project is coordinated to the same dimensional tolerance, material grade, and surface finish — eliminating the common problem of mismatched trim from multiple suppliers.
The L-shaped tile trim is, in many ways, the most honest component in an interior — it is visible at every corner, it fails conspicuously when it fails, and it determines whether a tiled installation looks refined or improvised. Specifying it correctly, and sourcing it from a manufacturer with the dimensional discipline to deliver consistent geometry and finish across large quantities, is one of the most cost-effective quality decisions in any interior specification.